Weighted blankets and lap pads

This has been a project that started out of a discussion with my sister. Both her boys are on the spectrum, with the youngest also having SPD. We both looked into making weighted quilts for them. I bought 5kg of pellets and some quilt panels, but she decided to make them for herself, so I had a surplus of materials, and no purpose for them.

I decided rather than waste them, I would make some therapy items for my school. I am normally militantly opposed to sewing things for work (people seem to want more and more if I do). However, we have a very challenging little person at school, who suffers badly with anxiety and emotion control, so I decided to make a weighted quilt, using this tutorial:
How to make a weighted blanket
 

I used the standard measurement of 10% of the childs body weight. I went on 20kg as an average, so the finished quilt is about 2kg. Thats about 23g of pellets per cell. I liked the tutorial, as it doesn’t mess around with trying to bind a very heavy thing.

Weighted blanket

I still had a surplus of pellets, so I used up some other fabric, and made weighted lap pads using the same method. These are 20x15in in size, and use about 900g of pellets per pad. These are for the “thinking space” at the school, a breakout room for little ones who aren’t coping on the playground or need some help with managing friendships.

Weighted lap pad

Weighted lap pads

They aren’t too heavy, but they are an assistance item for reassurance, not something to pin the child to the chair.

Posted in Craft and Sewing Patterns | 1 Comment

Strawberries and Cream Banana Bread

I also refer to this cake, as my “contingency cake”. I bake these when the bananas are on the verge of being binned, then freeze for morning teas at work.

Ingredients:

2 cups plain flour
1 tsp baking soda
1/2 tsp baking powder
1/2 cup brown sugar
1/2 cup caster sugar
1/2 cup butter
2 eggs
1/2 cup sour cream (or full fat yoghurt – gives a slightly different texture)
3 bananas – mashed
1 cup strawberries – chopped
1 tsp vanilla
**options*** demerara sugar

1. Oven 170 deg C – grease 1 large or 2 small loaf tins
2. Combine flour, baking soda and baking powder
3. cream butter and sugar
4. add eggs, vanilla, sour cream and bananas, mix thoroughly
5. fold in strawberries
6. fold flour into wet ingredients, mix well
7. Pour into loaf tin
8. bake 50-60mins (large tin) or 45-50mins (small tins) or until skewer inserted comes out clean.
9. Cool 10 mins in the tin then turn out and cool on a wide rack.

**optional** sprinkle top of cake with demerara sugar before baking.
**alternatives** tinned pie apples, diced dried apricots, cinnamon.

Banana Bread

Posted in Recipes | Leave a comment

The Walk Away Dress

When I began my sewing journey, it was primarily because of my daughter. She was a long skinny baby, and rapidly grew into a long skinny toddler. I found that to get clothes that fit her, I either had things that fit but were too short, or things that were the right length but hung off her like sacks. In order to get even the simplest items of clothing for her, I had to sew. As a result, she has been the primary benefactor of my sewing obsession. Its only in the last decade or so, that I have switched my focus to sewing for myself, however occasionally she will request.

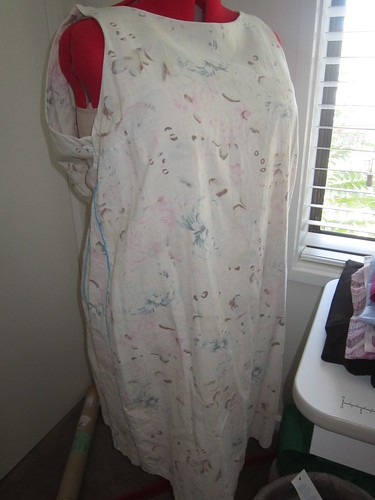
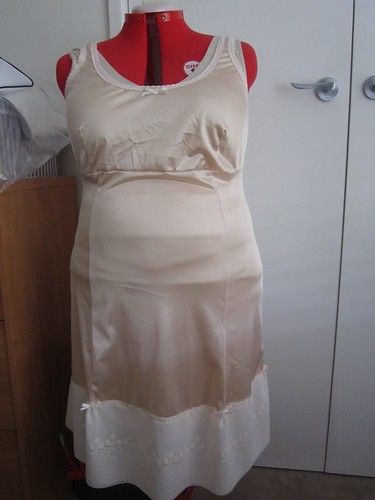
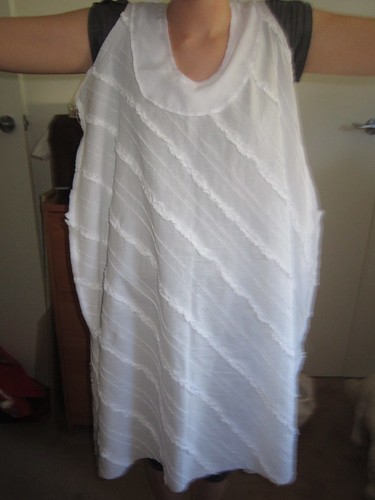
The Walk-Away Dress: Start it after breakfast…walk-away in it by lunchtime!” As seen on The Great British Sewing Bee, season 3, episode 3.11. DD is not a sewist, but saw this dress while watching GBSB with me, and asked me to make it. A very simple wrap around dress, sheath front, circle wrap around over skirt.

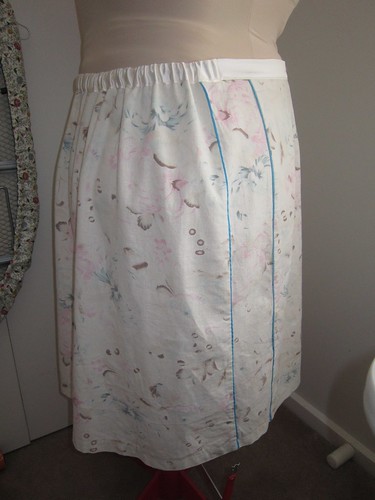
The first step, was to adjust the dress form back to her size (it does double duty when I sew for my niece). This is always an interesting exercise, as the dress form has to be squished to its smallest position, to go close to her size, and even then we can never get the waist as small as it needs to be. I also tissue fit the pattern on her, just to be sure it fits.

IMG_1668IMG_1667

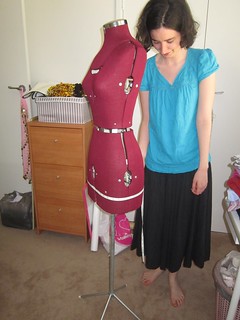
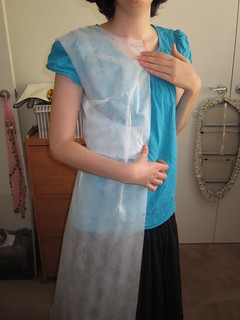
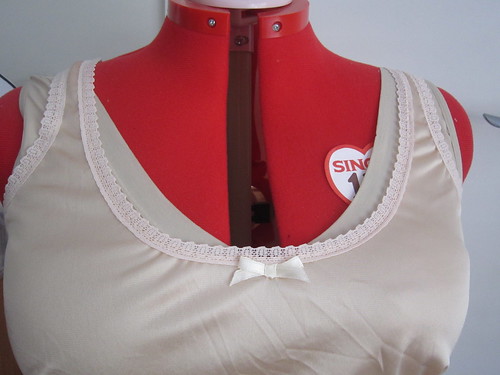
I am glad I did. Despite this being a modern interpretation of this pattern, it still seems the block is based on a shape that includes a corset/girdle. DD has a tiny waist, but I had to grade the bodice up to the next size at that point. Like me she has narrow shoulders. Unlike me, she also has a tiny bust. She takes after her grandmother, being a pure pear shape …. albeit tiny and tall. I can see that if I make her a fitted bodice dress, I am going to have to figure out how to do a SBA, oh joy!

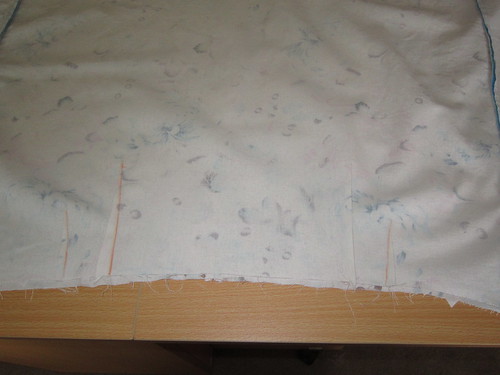
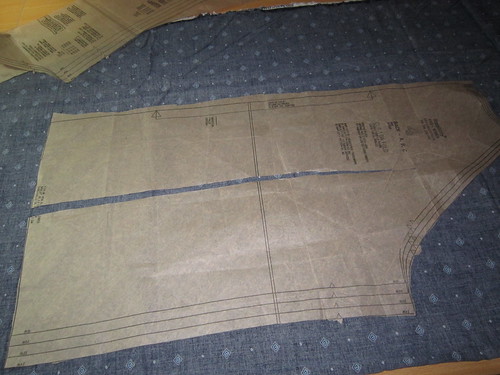
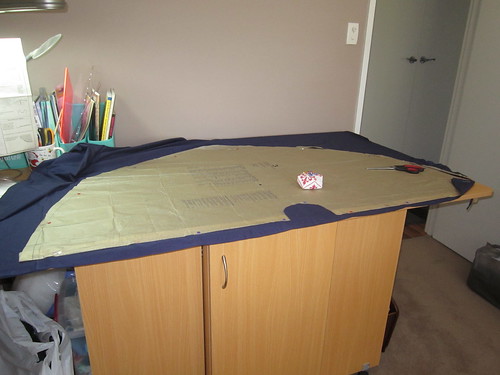
Next the cutting out. This required me to almost entirely clear the cutting table, as the skirt is ENORMOUS!!!

IMG_1670

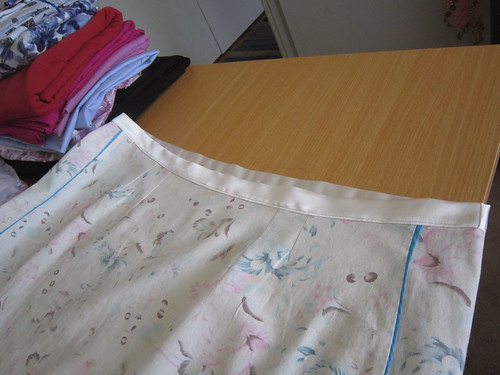
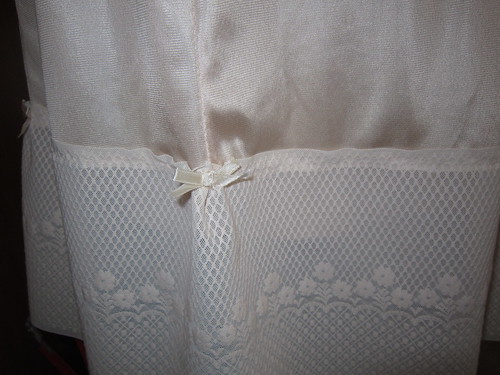
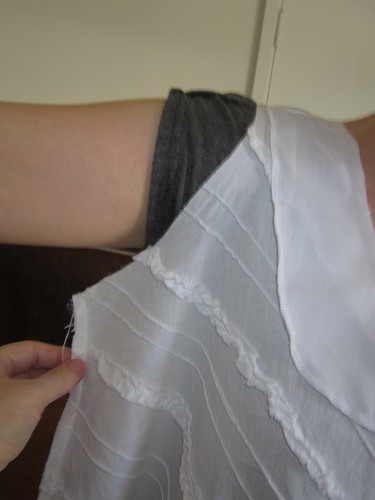
Its a simple enough design, quick to sew up. I did follow instructions to leave it hang for a day to let the bias “set” whatever that means. By far the most time consuming step ….. is applying bias binding to the edges. Using half inch bias means that the binding is super narrow, and inclined to slip away from the presser foot.

IMG_1691IMG_1692

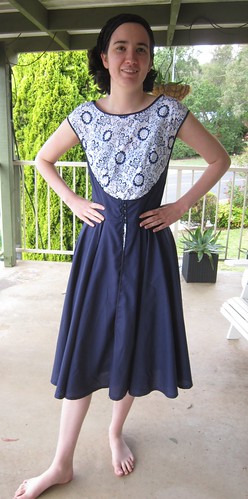
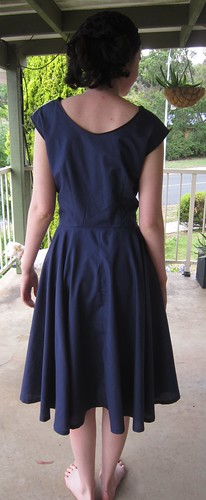
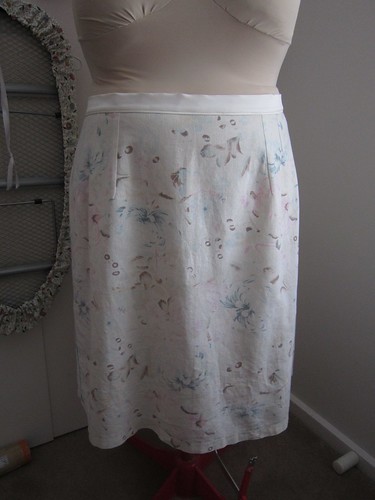
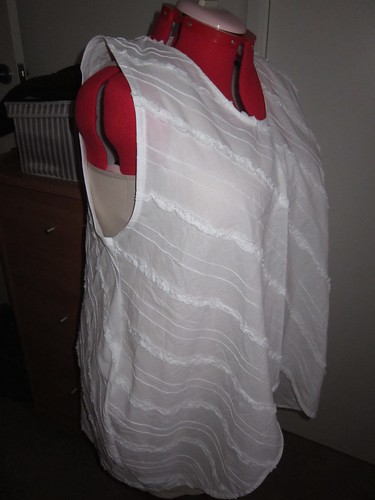
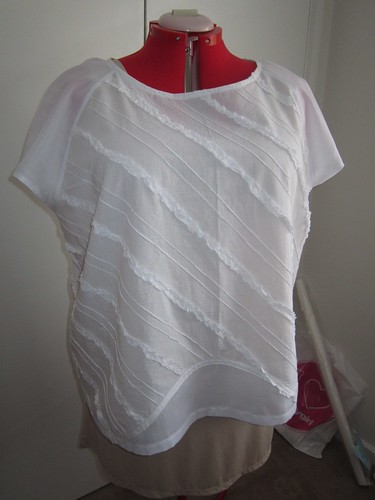
The design is interesting, but really the weight of the back of the dress is impractical. It drags the dress at the shoulders, causing the front dress to slide up.Pulling it tight on the waist goes some way to alleviate it, but it still pulls backwards. As soon as I finished it, I was going over in my head, how I could take a regular shift dress, and then incorporate the circle skirt overdress, anchoring in the side seams to carry the weight of the skirt better. Nah …. I think I just find a pattern for a circle skirt dress, and make that for her.  As an exercise in “sewing retro” this has been lovely. But the design shortcuts used to make this fit the super quick/easy dynamic, mean that the finished result isn’t as polished as it could be. DD loves the dress style, but has already asked for a different design.

Posted in Craft and Sewing Patterns, Gifts and Sewing Galore | 2 Comments

Upcycling an unattractive dress

I made this shift dress a couple of years ago. It was just as these dresses were appearing in the fashion world, and they fast became the “in thing” for the plus sized woman. I found the linen at Lincraft, and was keen to make myself a dress.

I, of course, have since discovered, that these dresses are just peachy, if you aren’t big busted, and don’t have a tummy or hips. If you have any of these, it becomes an exercise in fitting closely resembling the effort involved in having a space suit fitted. Combine my possession of boobs, belly and bum …. with my lack of height … and the resulting dress is wide and frumpy. It was not only banished ….. it was banished to the sewing room cupboard. I was SERIOUSLY put out with it not looking how I wanted it to, and refused to allow it to associate with my other clothing.

Shift dress upcycle

So this week ….. suffering a bad case of zero-sewjo ….. I decided to tackle this dress. It was a fairly simple up cycle. Just cut off the bottom of the dress, attach a waistband, and then presto! new skirt. I used my favourite Ottobre a-line skirt pattern (Ottobre 02/2010) to make sure I got the length right. Shift dress upcycle

The piped side panels in the dress, were there because I needed additional width in the dress. I decided I wanted to preserve these, because they are an interesting feature. So limited cutting out ….. no centre back zip, instead I add a couple of inches width, and then an elastic waist.

Shift dress upcycleAs I was keeping the front of the skirt flat, I decided to insert a couple of darts, just to add shape. These also made sure the panels sat at the side seams area, rather than pulling around to the back. I thought of cutting the waistband from the dress fabric, but this would have required me to piece bits, and negotiate around the zip. Instead, I cut a nice long strip of silk satin … lovely heavy satin I had in my stash from some bag making. I didn’t bother interfacing, as it was sturdy enough on its own. Shift dress up cycle

A simple method … stitch to the right side, press up the seam, then stitch down on the wrong side. I left the stitching open at the side seam positions on both sides, for elastic insertion. Anchor one side, pull up the elastic, and then a couple of try ons to get the right fit, and then anchor the other side.

Shift dress upcycleShift dress upcycle

I am going to make myself a couple of plain tshirts in complimentary colours, and then I think this skirt will be ready to wear to work. And I might just let it into the wardrobe with my other clothes.

Posted in Gifts and Sewing Galore | Leave a comment

Xmas Gifts – 2015

Steel yourselves everyone …. this is going to be a big post.

Last weekend, I finished the last of my xmas craft. This batch is specifically for my work friends. These people I value more than anything, because we are a team, and we look out for one another. The teachers are wonderful, but its the LSA’s, the BSO and my manager, who really pull together when we need to. So, lets begin:

Tote bag for Lindsay – my first foray into FMQ. I didn’t love it, although the bag turned out lovely.

Bags and pouches

Placemats for Rosemary – quilting cotton and cotton batting.
Oriental placemats

A set of placemats and table runner – using a charm square pack. This went to the BSO – Alex.
Placemats and table runner

Placemats for Robyn using a set of panels I bought on ebay. Really feminine I think.
Floral placemats

I made two of these – Table runners for Deb and Tiina.
xmas tree runner

I also made two of these – Tote bags for Kylie and Kim
Patchwork Tote

Xmas stars for Susan
Patchwork star decorations

Patchwork stars for Adam, Daniel, Rebecca and Charles
Patchwork stars

patchwork stars

Bread Basket and pot holders for Mandi
Trivet/Basket/pot holders set

A table runner for Narelle ….. I have another one of these ready to quilt for myself.
Table runner

And an evening purse for Cheryl.
Silk purse

I will do a separate post for the family gifts. This has a been a project started in August, so I am pleased to have them all done.

Posted in Gifts and Sewing Galore | Tagged , | Leave a comment

StyleArc Daisy Tunic and Pants

Mostly I sew knits, so its always an interesting exercise, sewing with woven fabric. While the actual sewing is easier, with fabric that feeds evenly and doesn’t tend to ripple, the trade off is fraying (especially linen) that needs controlling, and the inevitable extra effort required to fit my wonky body. However, there is a trend towards loose, flowing lines lately …. the LagenLook …. and that means tackling woven fabric.

My first foray into this area, was a pair of Tina Givens patterns (see my earlier post). This was a dismal failure, with shoddy pattern design and appalling quality of the patterns. In the past, this failure would have seen me close the sewing room door, and not touch my machines for months. However my confidence in my own abilities has grown, and I can recognise where a failure is not the fault of my skills, and instead is a crappy pattern.

So I have tried again, this time with the StyleArc Daisy Tunic and Pants.

DAISY DESIGNER TUNIC: The symmetrical double angled hemlines give this simple tunic a designer look. Choose your season, make it sleeveless or with a fashionable three-quarter sleeve. The inseam pockets are optional and the neck line is faced and can be top stitched using a contrast colour thread.
DAISY DESIGNER PANT: This trendy wide leg pant is not only fashionable but very comfortable with its elastic waist. Interesting patch pocket with side opening and wide faced hem make this pant a must have.

StyleArc Daisy Tunic

StyleArc Daisy Pants

StyleArc often say on their patterns that they follow an “industry model”. As a result, the language used in the instructions is often not consistent with language a home seamstress would use. For example in this pattern they refer to “turning the facing to the right side” when in fact they mean “turning the facing to the inside/wrong side of fabric”. Another foible is the use of the term “flat stitch” when they mean “under stitch”. These slight variations in language are more annoying than a problem for an experienced seamstress, but I wonder if they catch out beginners.

There are no instructions regarding pressing or finishing edges of facings or seams. Again, not a problem for the experienced, but may catch out the beginner. The crotch is quite short at the front, and I think in my next incarnation I will add some height to the waist all around. The pockets are situated quite low on the front, and I think I will move them up when I next make them up. Width added to the sides of the pants, to allow for a full tummy. In hindsight not needed for the back, and I will add less to the front in future.

Fabric Used:
Tunic – cotton cheesecloth
Pants – cotton linen

StyleArc Daisy pants and tunic

Summers in Australia are quite hot, and cool, loose fabrics are very welcome. I am looking at trying this again in perhaps a soft voile, perhaps lengthening the top to a long tunic length. Stay tuned.

Posted in Craft and Sewing Patterns | Tagged , , | 1 Comment

Tricot Slip

Some time ago, I purchased some vintage patterns and fabric from a garage sale near me. The patterns were a selection of 80’s lingerie patterns, including this one ….. KnitWit 5100 – Ladies Petticoat. The best part about these patterns, is that they were plus size. Its rare to come across that in vintage patterns. The fabric is a huge fantastic piece of nylon tricot, easily 2m wide, and plenty for petticoats and slips galore.

I chose the slip style (view B), because view A relied on the elastic lace to support the weight of the slip, and I didn’t like that idea. I also reinforced the shoulder seams with a scrap of cotton fabric, as I knew there would be a lot of strain at that point. I could probably do with taking a bigger dart on the bodice, as it was a push to stretch it to fit the skirt panels, but still, I got there.

Tricot Slip

The hemline lace is a bit of indulgence I know and its reasonably heavy, but I like it. This slip is earmarked to go under floaty foofy dresses and skirts, so pretty lace is a must. Plus the weight of the lace holds the slip down, as I have known slips to creep up my body on occasions. Given the lace is rectangular, and the bottom of the slip was curved, I placed some strategic gathered points, to take up the excess, and then topped them with a natty little bow.

Tricot slip

Yes I know …… I don’t normally do girly. One on the bodice too.

Tricot Slip

The slip sits just below the kneecap. Considering I chopped close to 3 inches off when I traced it off originally, that was originally a long slip. I am looking forward to wearing a very useful wardrobe staple.

Posted in Craft and Sewing Patterns | Tagged , , | Leave a comment

Sewing Journey – pattern alterations

I have been making my own clothing for quite a while now.  I have had a fair amount of mediocre results, a few resounding successes, and of course some spectacular failures.

Like all learning seamstresses, along the way, I have dabbled in alterations.  I am big busted and round bellied, requiring patterns to be changed for that.  Add to that, the fact that many pattern companies, build in masses of ease to their designs, and a learner can get caught making to measurements, only to find the item huge.

Many years ago, I purchased a peasant blouse top pattern.  I made quite a few, but being 10kg heavier than I am now, I struggled to get the fit to work.  Just learning to alter I chose the size based on my bust measurement (not the finished bust), and I went for the “slash and spread” method, reasoning I needed more width across the belly and hips.

Pattern alteration

There’s nothing wrong with this method, but this gave me a top huge across the back, shoulders and underarms, in order to fit my waist/hips. Not a good look. The pattern was shoved into the drawer, in disgust.

Fast forward to this year. I want another peasant top, but this time, I understand my dimensions better. I taped closed the slash, and then went at the pattern with the scissors, altering as I cut out. Instead of cutting the whole pattern as a 24; I cut the neckline, sleeves and underarms, at a size 20 (this gave me approx 2in of ease across the bust), grading out at the side seams starting just above the bust point.

I will update this topic, when I have made up the top, but I am fairly confident this will give me a better fitting top. Stay tuned.

Posted in Craft and Sewing Patterns | Leave a comment

Feeling mellow ……

Alcohol …….

Interesting stuff …. alcohol.

Having an iodine allergy bites, mostly because it counts out most alcohol.  No vodka, no wine (red or white … allergic to sulphur too), no tonic for gin, no sweet liqueurs.

So what are my choices?

Rum?  too sweet, and tends to make me tired and weepy.

Beer?  ick …. same with ginger beer.  Not fond of the faint yeasty taste.

Scotch?  I love this stuff, can even drink it straight.  BUT …… I get feisty, mouthy, and I pick fights. Not a wise choice.

So tonight, for that fuzzy mellow feeling, I have had some apple cider.  I am not overly in love …. but I am mellow.

Posted in Uncategorized | Leave a comment

Persistence

When I bought this fabric, I didn’t really like it.  Oh sure it was a great price, and I am sure I could figure out something to make out of it … but was it really me?  I bought 5 metres of it.

And so the first incarnation ….. a Tina Givens dress.  A loose fitting, Lagenlook style dress, with attractive drawstring channels on the front giving movement to the bottom of the dress.  This was supposedly from her Goddess range (sized particularly for plus sizes apparently).  I checked the measurements, and considering online reviews consistently said this pattern range runs huge, I was confident choosing the size that matched my full bust measurement.

This, is the half finished dress …… on my daughter (size 8 at a push).  The armholes are tiny, the neckline is incredibly shallow, and the whole thing is too small.  I was kicking myself because I wasted a buttload of fabric, on a dramatic drafting error.

Error in a pattern  Error in a pattern

So the dress and scraps went into the UFO box, until I could figure out what to do with it. TG did give me my money back, so I at least was happy with the follow up customer service. In the email, I was encouraged to try again. So I did, using one of her free slip patterns, this time with a scoop at the front to create a high/low hemline. I did have to shorten the slip to a tunic length as I didn’t have a big enough complete piece of fabric, but the main features were still in place.

Tunic failureYet another failure. Massive armholes revealing far more side boob than I am comfortable with, yet a neckline that was way too high. Weird shoulder seams that sat up like wings, and a tulip shape guaranteed to make me look like a blimp. The lack of any bust shaping, means that I had twin mountain ranges running down the front of the tunic. At this point, I recycled the TG patterns I had printed out, into the bin. I don’t ever want to touch their designs ….. ever again. They are poorly drafted, and shoddily designed. But, how to salvage at least some of the fabric?

A recent splurge on StyleArc patterns, brought me the Amber Woven Top as a freebie. Now my only other excursion with woven SA patterns wasn’t a success, however I was willing to give it another go. This top is raglan sleeved (a favourite style of mine), loose fitting pullover blouse. I used it as a template, choosing to not apply the piped facing pieces this time. Instead I left the bodice pieces plain, using bias binding on the complete neckline. As you can expect, whittling down this fabric with every failed incarnation, meant that I had to augment to achieve this design. The sleeves, along with the front inset, are white batiste.

StyleArc Amber Woven TopStyleArc Amber Woven Top

The top is a little big across the upper back, resulting in a bit of excess under the arms, but that is an alteration I almost always have to make, so it will be easy to alter for the next version. Overall, a success after so much failure, and an exercise in persistence. Just a shame I had to use almost 5 metres of fabric to get to this point.

Posted in Craft and Sewing Patterns | 6 Comments