The Bookshelf Quilt

Its not often I get inspiration for my quilt making. Unlike my very good friend Raylee of Sunflower Quilting (who is a professional quilter artist!), I am less inclined to challenge myself, preferring to make pretty things that keep people warm.

However, this is the exception to the rule.

Deb is the librarian at the school I work at. She has been with the school for *ahem* many years 😛 . In addition to all the wonderful work she does for the students, she keeps the teachers stocked with lollies and chocolates, she’s the one who does all the recording for sports carnivals, she manages the report producing process, organises the duty timetables, and will jump in and help wherever she is needed. She is a legend.

I came across this tutorial, and it fired the imagination.

Mini Bookshelf Tutorial

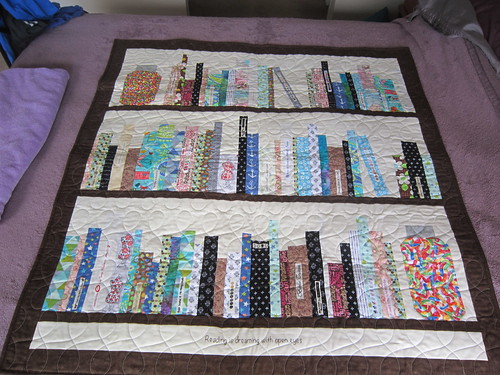
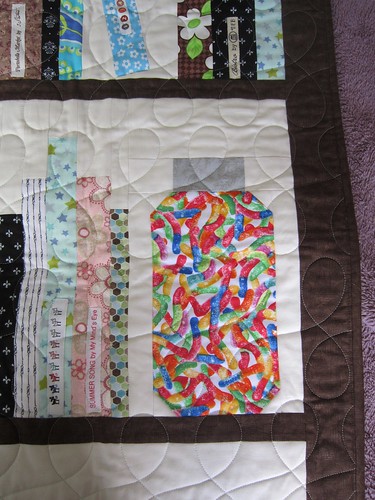
I broke my own rule about never cutting out fabrics, or making scrap quilts. I didn’t want to make a mini quilt, so I set about expanding this tutorial, to make a good sized lap quilt. In addition I had to source a jar block tutorial, because Deb’s Library had to have lolly jars.

Deb's quilt

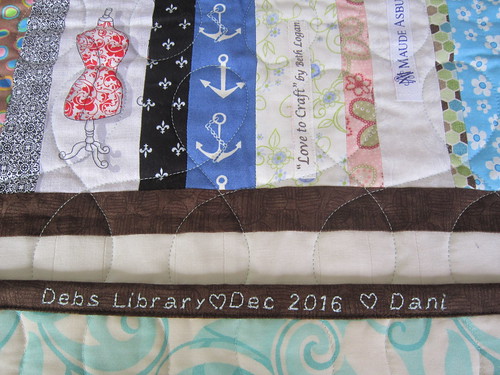
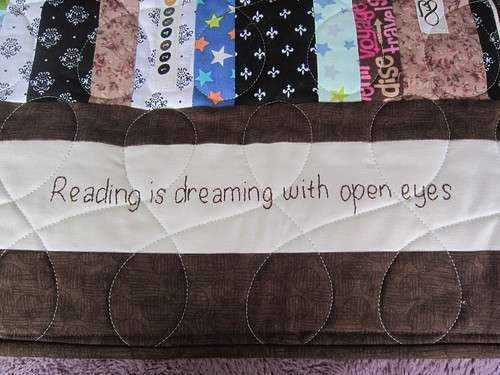
Any book quilt needs a good quote:
Deb's quilt

and a lolly jar or two
Deb's quilt

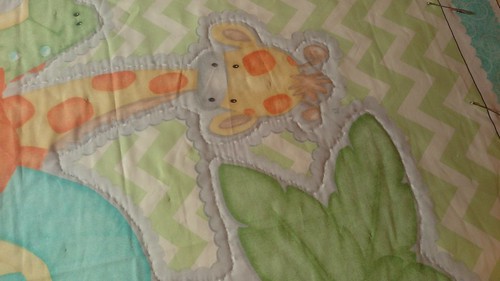
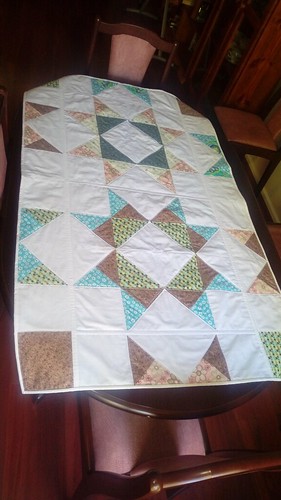
Raylee put an nice gentle meander quilting over the whole thing; I think a good counterpoint to the straight lines of the books. The fabrics are all left overs from various projects I have done over the last few years. Its like an eyespy quilt but only for me.

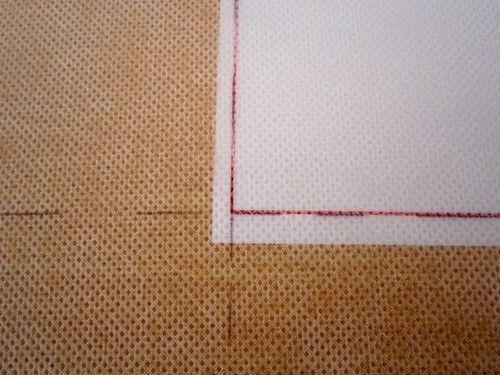
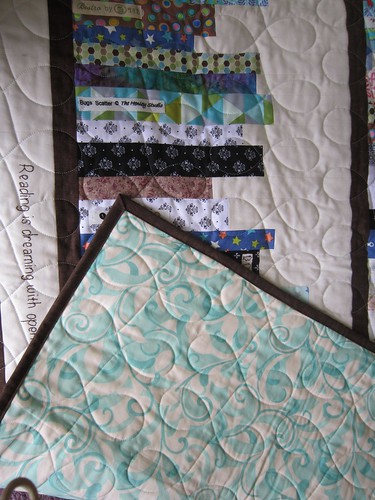
And because life isn’t complete without a corner shot.
Deb's quilt

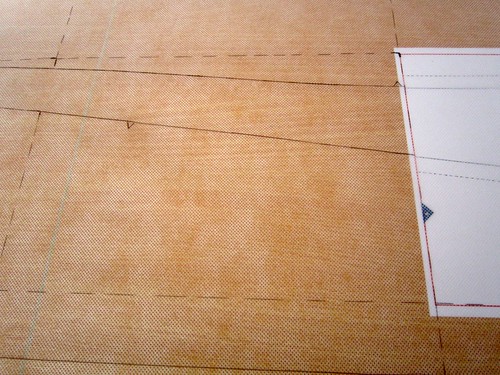
Spine labels out of selvedges. I had to get these from another quilter, as I usually only sew with pre-cuts, and I didn’t have any.

Deb's quilt

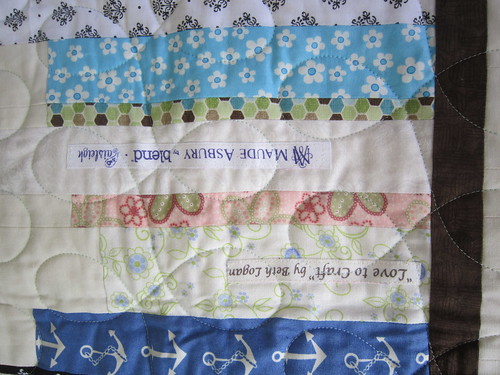
And my own form of labelling. Machine stitched using the letters on my sewing machine, straight onto the binding before stitching it on.

Deb's quilt

Posted in Gifts and Sewing Galore, Quilting - but not a quilter!, Uncategorized | 1 Comment

Barter clothing

I am a big believer in bartering skills.  I am quite happy to pay for a service, but its nice when someone values my skills, as much as I value theirs, and is willing to swap.

I had a quilting project that I wanted done  (details to come at a later date), that I was quite willing to pay for.  My friend is a professional quilter, and to me a stunning artist. But, she is very time poor.  I appreciate that while she is a talented seamstress, she just doesn’t have the time to devote to putting together an outfit of clothes.  Sewing clothing is a slow process; the nature of the fabrics mean that you can’t rush.  So I offered to make her some clothing pieces, in exchange for the quilting project.  I do think I got the better end of the deal.

The fabric she gave me, was a very fine houndstooth pattern wool, stunningly soft, in hot pink, orange and cream.  She had cut out the panels (the pattern supplied was a 6 gore skirt), and supplied piping in hot pink.

Checked wool skirt 

I inserted a standard dress zip, as I felt an invisible zip may give under pressure.

Checked wool skirt

The hot pink piping was inserted between the front and back gores. Primarily this was to avoid the hassle of trying to match the very small pattern. Because I inserted a lining, I used twill tape on the waist seam. I could have used the lining as the waist treatment, but I was aware that without something to grip, the skirt would be prone to spin around the body.

Checked wool skirt

But, I have an issue with the fact that with such a vibrate fabric, there will be a danger of creating an orphan. Without something to match, the skirt is at risk of hanging in the wardrobe, and not getting worn. I picked up a beautiful thick burnt orange cotton/lycra, and cream cotton drill. Using the same pattern (sorry forgot to note the pattern number) I made a matching tunic, and a short jacket.

Wool skirt outfit

Considering the busyness of the skirt, the plain rich colours are a good offset. Thank you Raylee, for the opportunity to sew for you.

2016-11-06_05-49-47

2016-11-06_05-50-25

Posted in Gifts and Sewing Galore | 1 Comment

Mental health check

Having suffered mental health issues as a teenager, I am aware of my “balance”. When I am feeling the strain, and when I know that my brain needs to cut it out and give me a break.  Sometimes these moments sneak up on me, but sometimes, I can feel them building, even see it.  Its a level of clarity that comes from a lot of introspection, although I am not 100% sure it helps a lot.

I am not feeling overly loved at the moment.  This is not anyone’s fault really.  Hubby’s work is intense and stressful and absorbs the majority of his emotional quota.  His hobby tends to be all-encompassing at the moment, perhaps in an effort to offset the stress of the work, but some days I wonder why he bothers, since it seems so stressful all on its own.  I feel that in the competition for his attention, I am fighting a losing battle with electric vehicles, computers, his mates and even books.  I bite my tongue, not because he doesn’t care, but because I know that these are his pressure valves, and he needs them.

My sister is fighting her battles, my brother is living his committed bachelor life, my children of course have their own lives to live, friends have busy lives ……… I just don’t feel all that paramount in anyones life right now.

Its these times, when I feel isolated, thats when my brain messes with me.  A footballer recently commented that its that internal voice, that says you are worthless, and unloveable … that is hardest to deal with. And it never goes away.  My internal voice takes every little event, and turns that into a judgement on me.  On my loveability ….. on my worth.  I find I throw myself into my sewing, and cooking ……. desperate for approval and acknowledgement.  I find myself then brushing these compliments off (annoyingly, just like my mother used to) because while I do it for the approval, in reality I know its not that big a deal.  I find myself cringing internally, because at times I feel like I am a 5 year old, jumping around going “look at meeeeee”.

I would love to know how I could change my landscape….. change how I view myself, and how I get my emotional needs met.  I would love to know how I could communicate this to my husband, and to my family, without adding to their emotional burden.   I don’t have the answers yet …. probably never will.

Tagged | Leave a comment

Cheung Sam for my daughter

Quite a few years ago, my daughter chose this dress pattern as her Year 10 graduation dress. It was a trial of difficult fabric (silk brocade …. eeeeekkkkkkk), tricky new pattern, and fitting my super tall daughter. She is a different shape to me, a wonderful slender tall girl, a little hippy or bottom heavy, but still closer to the pattern than I ever get.

She is going to a hen’s night and wanted another dress. She went for a shorter, less formal length (amazingly, above her knees), and this time we went with a Polyester/Rayon Brocade. The fabric is a lot stiffer, although its softened up with handling. Its got a wash tonight so hopefully it softens up more.

Cutting out:
After the debacle of the magical shredding silk, I was determined that I wouldn’t have the problems a second time around. Instead of cutting everything out, sewing seams and then finishing the seam edges …. I cut out each piece, and then immediately serged each of the cut edges. In hindsight, it was probably unnecessary, but I prefer to be cautious.

Cheung Sam dress for Naomi

Reinforcing:
I struggled with the overlap stretching out last time. This time I used some seam support along the upper neck edge.

Cheung Sam dress for Naomi

Zip:
The longest zip on the planet.
Cheung Sam dress for Naomi

Fitting:
Don’t you love patterns that don’t have finished widths, or any information on how much ease is included. My daughter had grown slightly since she was 16 (who doesn’t), not hugely, but just enough to go into the next set of measurements on the packet.  Add to that, its been so long I can’t remember how many changes I made to the dress previously. However, at the fitting point, we had just way too much width. I took it in at the side seams, and under the bust.

We got there in the end ….. metres and metres of hand stitching of the lining …. to the neckline, the zip and the hem. Perhaps bagging would have been a better choice, but oh well.

Cheung Sam dress for Naomi

Posted in Craft and Sewing Patterns | 1 Comment

Animal Quilt – baby gift quilt

This is a gift for a work colleague, who is pregnant with her third child.

The panel was a purchase from my local Spotlight (Aussie equivalent to Joanne’s) not the best quality, and slightly off grain, but cute. My standard quilt MO is straight lines, or wavy lines. However, as I hadn’t done any piecing, I though maybe I should make a bit more of an effort. The animals in the centre have a white on grey dotted outline, obviously meant to mimic hand quilting, so I started by adding an extra layer of batting in that area, stitching *, and then trimming the second layer of batting back to the stitch line. (apparently there is a name for this, no idea what). Then … I followed the zig zags, and outlined the frames.

*yes ….. I actually did some free motion quilting, but I am not a quilter

Outlining the animals

Looking at the quilt, I realised that a simple outline on the animals wouldn’t be enough, as the space in the middle exceeded the quilting distance of the batting. So I whacked the FMQ foot back on, and set about highlighting the outlines on some of the animals. This actually turned out better than I planned, and I can see that practice will help the evenness of my stitches.

Animal Quilt

The end result is a slightly puffy centre to the quilt. However because I use 100% cotton in all my quilts, the loft isn’t all that significant. I think its more a texture effect.

Animal Quilt

Next is the binding. I decided to try flanged binding (Missouri Star Tutorial here ). Binding is orange, with the flange in pale green. It worked out ok, although I had been sewing the entire afternoon by the time I got to the binding, and in hindsight, should have left it to the next day. I ended up unpicking, and restitching at one point, as I had a tuck in the binding that messed with my mind.

Animal Quilt

So quilt is finished, and tucked away in the present box ready to be wrapped and taken to work. I think its time to switch back to clothing for a while.

Animal quilt

Posted in Gifts and Sewing Galore, Quilting - but not a quilter! | 2 Comments

Good enough and WOMBATS

Anyone who has seen my sewing room, will know that I am a wee bit obsessive.
tidy sewing room

I can’t work in a mess, I am not a “creative thinker” and I value order and predictability.

That being said, it may be a surprise to many that I don’t seem to always apply that level of obsessiveness to my sewing. I am a big believer in “good enough”. Hem a bit wobbly, seam not quite straight, button hole 2mm off, collar not quite even…….. I have learnt that while aiming for good quality is great, it doesn’t necessarily mean you have to sacrifice fabric or your sanity, when something doesn’t work out.

I made two blocks, following the Missouri Quilt Company tutorial for a Missouri Star.
star #2

Of course once they worked out, I decided to make things harder for myself, by using the blocks for a Quilt As You Go quilt. I bought a big piece of backing fabric, and decided to start. After doing two blocks, I realised I had made some fundamental errors. The backing fabric was the wrong tone to match, and the quilting looked abysmal, and I didn’t like the joining mechanism. To add insult to injury, I ran out of the white, and when trying to source more hit a brick wall. Who knew there were so many shades of white?

These blocks had now become a WOMBAT —- waste of money, batting and time.

But,I am not one to waste fabric. I wasn’t going to get stressed about the look of the blocks or the backing ….. instead I made some extra pieces, threw them together with indecent haste, and then bound the lot. The result is not quilting at its best. Points are cut off and misaligned, seams don’t line up, there are two shades of white on the quilt, placement is questionable, and I could probably have rounded off the corners.
Table protector

What I do have, is a table mat that protects my dining table from hot cups and scratches, that doesn’t hang down to get pulled off by accident, and that I won’t mind if food spills on it.

It is good enough.

Posted in Craft and Sewing Patterns, Quilting - but not a quilter! | 1 Comment

Tracing PDF’s

One of the most tedious things about sewing from PDF patterns is laying out and taping the patterns. Often you are left with a huge piece of tacked together paper, that will not fold well. And, once the entire thing is taped together, you have to go through the whole process again, to trace the pattern, because copy paper is rarely great to pin to fabric. Yes you can get a pattern printed in A0, but I often want to jump straight into a pattern, not wait till I next have time to get to the printers.

Last weekend I taped together a craftsy pattern, and that was a tiresome exercise. I thought there had to be a better way…… especially when I tried to fold the blinking thing back up. Then I remembered someone commented on a topic somewhere, about tracing each page individually, skipping the taping. I had no other directions, but I decided to give it a go.

Key I think, is if your pattern has a layout guide. This tells you which pages go where.

Tracing PDF's

Then, start at your top left page, and place it at the corner of your tracing material (I use Trace’n’Toile, but you could use interfacing or any other type of material you can see through). Trace not only cutting lines and markings, but also the cutting edge of the page (I used dashed lines).

Tracing PDF's

Continue, lining up subsequent pages with the page edge lines, and the patterns lines as well. Remember to mark what the piece is, and any grainlines as well.

Tracing PDF's

Your pattern will be interspersed with dashed lines, but as long as you don’t use those to indicate other parts of the pattern, they should be easy enough to ignore.

Tracing PDF's

NB: I traced the pants legs in two parts, but the edges are marked with dashed lines, so I can line them up and sew them together, or just layer them when pining to fabric.

Best of all ….. a very tedious step has been totally removed. Yay!

Posted in Craft and Sewing Patterns | 4 Comments

A weekend of black ………

I don’t sew a lot of black things ……  Its hard to see, requiring frequent stops to rest my eyes.  And sewing black requires the overlocker (and coverstitch) to be rethreaded, something I find tiresome and avoid at all costs.  Which is ridiculous, considering it takes very little time. So, my weekend started with a minor clean up of my cutting table, followed by rethreading the overlocker.

And I was off!!!

First cab off the rank, was my TNT Singer Plus blouse, this time with 3/4 length sleeves in black embroidered cotton. I need to source the buttons for this, but its pretty much done. I will now have a black blouse, to wear with a couple of skirts that are bordering on orphans at the moment.

blouses

Next along, was another TNT, the StyleArc Amber blouse, in a light cotton lawn. I faced the neckline of this one, rather than binding, and I am preferring the clean lines. I wonder if I will ever make this pattern up as its mean to, with the piped facings?

blouses

And finally, a re-purpose of an old skirt. This tiered boho skirt, is a lovely comfortable skirt to wear, and I have had it for a couple of years. But, the shirring is aging, and really it is a tiny bit too long, tripping me up occasionally.

Boho skirt remakeBoho skirt remakeBoho skirt remake

The skirt has a lining, so I staystitched along just under the elastic, to anchor the lining. Then I cut off the shirring just above the stitching line.

I used my KwikSew lounge pants pattern, cutting out a set of waistband yokes. I have used this yoke on a couple of other items, and its quite a versatile waist treatment. Elastic was some very wide underwear elastic I had in the stash, stitched to the upper seam and enclosed into the yoke. I basted the open edges together with a 3 step zigzag.

Boho skirt remakeBoho skirt remakeBoho skirt remake


Then, its just a matter of stitching the yoke to the top of the skirt, stretching to fit, again using 3 step zigzag. I then ran the seam through the overlocker, just to finish everything off.

Boho skirt remake

This a much more stable waistline, and an added benefit, it has shortened the skirt by a couple of inches, eliminating the trip hazard caused by my height. I expect another couple of years out of this skirt.

Posted in Gifts and Sewing Galore | Leave a comment

I am all peopled out!

This is the standard statement that my sister says.  She often says that she suffers from “social aversion”.  She doesn’t particularly like people, dislikes crowds, will not go to parties, and hates shopping.  Its a quirk of her personality, that I have always said was particular to her.

But today, I have realised that I also suffer from it.

We had school photos today.  I had lots of organisation to do.  Getting everyone in the right place at the right time, tracking down wayward students, getting the family photos organised, talking to parents, teachers and the photographers.   I have spent the day being chirpy and happy,  organising everyone …. hell I didn’t sit down at my desk until almost 12.30pm.

I got home, and of course after a day of teaching Naomi was anxious to chat, as was Nathan.  I decided I had had enough!!!!!!

“I need some non-contact time ….. RIGHT NOW!!!!!”

Like my sister, I am peopled out ….. please don’t make me people anymore!

Tagged | Leave a comment

Vintage Sewing and pretty fabric

I love sewing with luxurious fabrics ….. silk, satin, chiffon, organza and lace. They aren’t easy fabrics to sew with, more of a challenge. But, sewing in adult proportions is an exercise in $$$$$. My daughters yr 10 graduation dress cost close to $150 in materials, and her year 12 graduation dress & coat was closer to $350 in materials.

Many years ago, back when I first started sewing, I picked up a vintage baby dress pattern in a charity shop. I used the pattern to make a matinee jacket and bonnet for a friend’s baby. Since that time, I had an idea that I could use the pattern, to make special baby clothes.  In part this is because of the simply beautiful gown we were gifted when we lost Isabeau; a stunning smocked affair donated by the Smocking Guild. Dealing with bridal fabrics a few years back, I realised that I could combine my love of special fabrics, and experimenting with these vintage patterns, and make christening gowns. Perhaps I will have a go at heirloom sewing techniques eventually (although I just don’t feel I am artistic enough for smocking), but for now, its just a pleasure creating something pretty.

I just love the way the old patterns yellow with time:
Newborn christening outfit

And here is the first part; a simple a-line petticoat, edged with wide lace at the hem, satin ribbon, with the neckline and armholes bound with satin bias. The fabric is silk/cotton voile; in hindsight just too fine for this work. I think I will probably use the rest of this fabric to underline future gowns, where the fabric is rough underside. And I may do this petticoat as a double layer in future, to present a neater neckline/armholes.
Newborn christening outfit

And the gown; this is a buttery soft (possibly silk) satin, really luscious to touch. I say possibly, because its a piece of thrifted fabric, that I found in an op-shop many years back. The colour reminds me of the gown a friend wore at our debutante, which she accessorised with lilac, which is what inspired me to use the lilac ribbon. My friend was a redhead, a real strawberry ginger, but she just glowed in this colour, and it was beautiful.
Newborn christening outfit

I haven’t decided what I will do with this sort of sewing. I may give away, or sell, I don’t know yet. This outfit is an experiment, just to test the pattern. I may make more, I don’t know.

Posted in Gifts and Sewing Galore | 1 Comment